

How to Roast Artisanal Coffee Beans at Home
TL;DR:
- Learning to roast artisanal coffee beans at home allows you to control flavor development and freshness with minimal equipment. Using sensory cues like first crack and proper ventilation ensures a safe, consistent roasting process that enhances your coffee’s unique origin characteristics. Repetition, careful note-taking, and understanding chemical change stages are essential to mastering your preferred roast profile.
If you want genuinely fresh, flavorful coffee, learning how to roast artisanal coffee beans at home is one of the highest-impact skills you can pick up. Green beans are shelf-stable for months, and roasting them yourself means you control every variable that shapes taste. Most beginners assume it takes professional equipment or serious technical knowledge. It does not. What it takes is patience, attention to your senses, and a clear process to follow. This guide covers everything from choosing the right green beans to nailing your first crack and storing your roast correctly.
Table of Contents
- Key takeaways
- How to roast artisanal coffee beans: equipment and setup
- Step-by-step roasting process
- Comparing methods for artisanal flavor
- Post-roasting care, storage, and common mistakes
- My honest take on learning artisanal roasting
- Ready to take your roasting further?
- FAQ
Key takeaways
| Point | Details |
|---|---|
| Green bean selection matters | Choose single-origin or specialty-grade green beans to get the most from artisanal roasting. |
| Sensory cues guide roast level | Color, aroma, and the sound of first crack tell you more than a timer will. |
| Temperature windows are specific | First crack happens around 385–401°F, giving you a precise reference point for roast control. |
| Cool beans fast after roasting | Transfer to a metal colander within minutes to stop chemical reactions and lock in flavor. |
| Rest before brewing | Let roasted beans degas for 12 to 24 hours before grinding for the best cup. |
How to roast artisanal coffee beans: equipment and setup
Before you touch a single green bean, get your workspace right. This is where most beginners skip ahead and pay for it later.
Choosing green beans
Not all green coffee is created equal. For true artisanal results, look for single-origin beans with clear sourcing information, a harvest date within the past year, and a flavor note description from the seller. Washed Ethiopian beans tend to develop bright, floral notes at lighter roasts. Natural-processed Brazilians lean nutty and chocolatey at medium roast. The bean’s origin and processing method shape what your roast can produce, so this decision matters before you apply any heat.
Roasting devices you can actually use
You have four realistic options as a home roaster, each with real trade-offs:
- Cast iron skillet or wok on a stovetop burner. Low cost, high hands-on effort. Works for small batches of 100 to 150 grams.
- Conventional oven on a baking sheet. Easier for slightly larger batches but gives you less real-time control. Roasting times in an oven run around 12 to 15 minutes.
- Air popcorn popper. Underrated and genuinely excellent for beginners. It agitates beans automatically and can finish a roast in 6 to 10 minutes.
- Dedicated home roaster. Machines designed specifically for this purpose. They offer the most control over temperature curves and airflow, but they cost more.
Here is a quick method comparison to help you decide:
| Method | Batch size | Control level | Pros | Cons |
|---|---|---|---|---|
| Stovetop skillet | 100–150g | Low | Cheap, immediate feedback | Requires constant stirring |
| Oven | 150–250g | Medium | Larger batch capacity | Slower, less even heat |
| Popcorn popper | 75–100g | Medium | Auto-agitation, fast | Small batch, loud |
| Dedicated roaster | Varies | High | Precision, repeatability | Higher upfront cost |
Ventilation and safety non-negotiables
Effective ventilation is not optional. Roasting produces significant smoke and a dry, papery byproduct called chaff, which is the silverskin that separates from the bean during roasting. Chaff is flammable. Roast near an exhaust fan, with a window open, or outdoors if you are using a stovetop method. Keep a fire extinguisher nearby and never leave an active roast unattended. Have an airtight container ready for storing beans once they cool.
Pro Tip: Line a baking sheet with aluminum foil before catching chaff from a popcorn popper. It makes cleanup fast and reduces the fire risk of loose chaff near heat sources.
Step-by-step roasting process
This is where the craft actually lives. Follow these steps and pay close attention to what your beans are telling you at each stage.
-
Preheat your device. For a skillet, heat it over medium to medium-high for about 3 minutes. For an oven, preheat to 450°F. For a popcorn popper, run it for 30 seconds before adding beans.
-
Add your green beans. Use a single layer in a skillet or oven tray. In a popcorn popper, fill to the manufacturer’s recommended level, usually around 75 grams.
-
Agitate constantly on the stovetop. Shake or stir every 15 seconds to prevent scorching and ensure even heat distribution. Uneven agitation produces beans that are half light, half dark, with no consistency in flavor.
-
Watch for color changes. Beans start yellow-green, turn light yellow as moisture escapes, then progress to tan and brown. This drying phase typically takes 4 to 6 minutes.
-
Listen for first crack. Around 385 to 401°F, you will hear a popping sound similar to popcorn. This is first crack. It signals the start of caramelization and real flavor development. This is your primary cue, not your timer.
-
Decide your roast endpoint. Stopping shortly after first crack gives you a light roast with high acidity and delicate flavor. Continuing develops a medium roast with more body. Pushing to second crack (a quieter, more crackling sound) gives you darker, more bitter flavors with less origin character.
-
Remove and cool immediately. Transfer beans to a metal colander and stir vigorously with airflow. Cool them within 4 minutes to stop all chemical reactions and lock in your intended roast level.
Here is a reference table for the main roasting stages:
| Stage | Temp range | Color | Key sensory cue |
|---|---|---|---|
| Drying | 212–320°F | Yellow-green | Grassy, hay-like aroma |
| Browning | 320–385°F | Tan to light brown | Bread-like, toasty smell |
| First crack | 385–401°F | Medium brown | Audible popping, caramel aroma |
| Development | 401–430°F | Medium to dark brown | Sweet, complex roast aroma |
| Second crack | 430°F+ | Dark brown | Crackling sound, smoky smell |
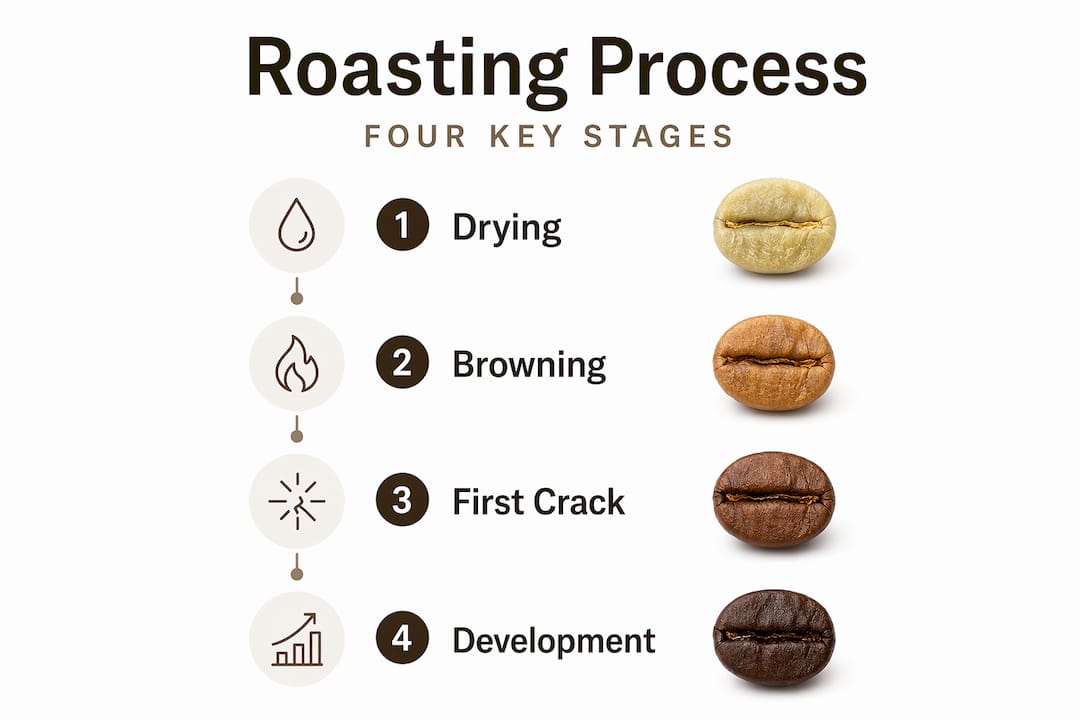
The Maillard reaction and caramelization that happen during the browning and development stages are what produce the layered flavors artisanal coffee is known for. Understanding this helps you see roasting not as simple heating but as a sequence of chemical changes you are steering.
Pro Tip: Set a timer and take notes every roast. Write down bean origin, starting weight, heat setting, time to first crack, and your roast endpoint. After three or four batches, patterns emerge that make you significantly more consistent.
Comparing methods for artisanal flavor
Choosing the right roasting method shapes your flavor outcome as much as the bean origin does.
Stovetop roasting gives you the most direct, hands-on contact with your beans. Because you are stirring manually, you feel the heat changes and notice color shifts in real time. The downside is that heat distribution is never perfectly even, which can result in a slightly mottled roast. That said, many skilled home roasters prefer it specifically because of the feedback loop it creates. For learning, it is hard to beat.
Oven roasting allows slightly larger batches, which is useful if you brew for multiple people. The trade-off is that you lose the constant agitation, and hot spots in ovens can unevenly develop beans. Rotating the tray every 3 to 4 minutes helps. Oven roasting tends to produce a slightly baked, flat flavor compared to air-based methods, which is why it is better for medium and darker roasts where that character matters less.
Popcorn poppers produce some of the cleanest, most even light roasts you can achieve without a dedicated machine. The forced air keeps beans moving constantly, which mimics what professional drum roasters do mechanically. Roasting times are short, typically 6 to 10 minutes, which means you develop brightness and clarity without prolonged heat degrading delicate flavor compounds. If you want to experience what a single-origin Ethiopian or Kenyan bean actually tastes like at a light roast, a popcorn popper is your most reliable entry point.
Dedicated home roasters are the right move once you know you are committed to this hobby. They give you repeatable control over airflow, temperature ramp speed, and batch size. They are the clearest path to flavor layering in coffee that holds consistent across every batch.
Post-roasting care, storage, and common mistakes
Getting the roast right is only half the work. What happens in the next 24 hours determines whether all that effort translates into a great cup.
After cooling, your beans are releasing carbon dioxide through a process called degassing. This CO2 was produced during roasting and needs to escape before the beans are ready to brew. Grind and brew too early, and CO2 interferes with extraction, making your coffee taste sour or underdeveloped. The ideal rest period is 12 to 24 hours for light roasts, and up to 48 hours for darker ones.
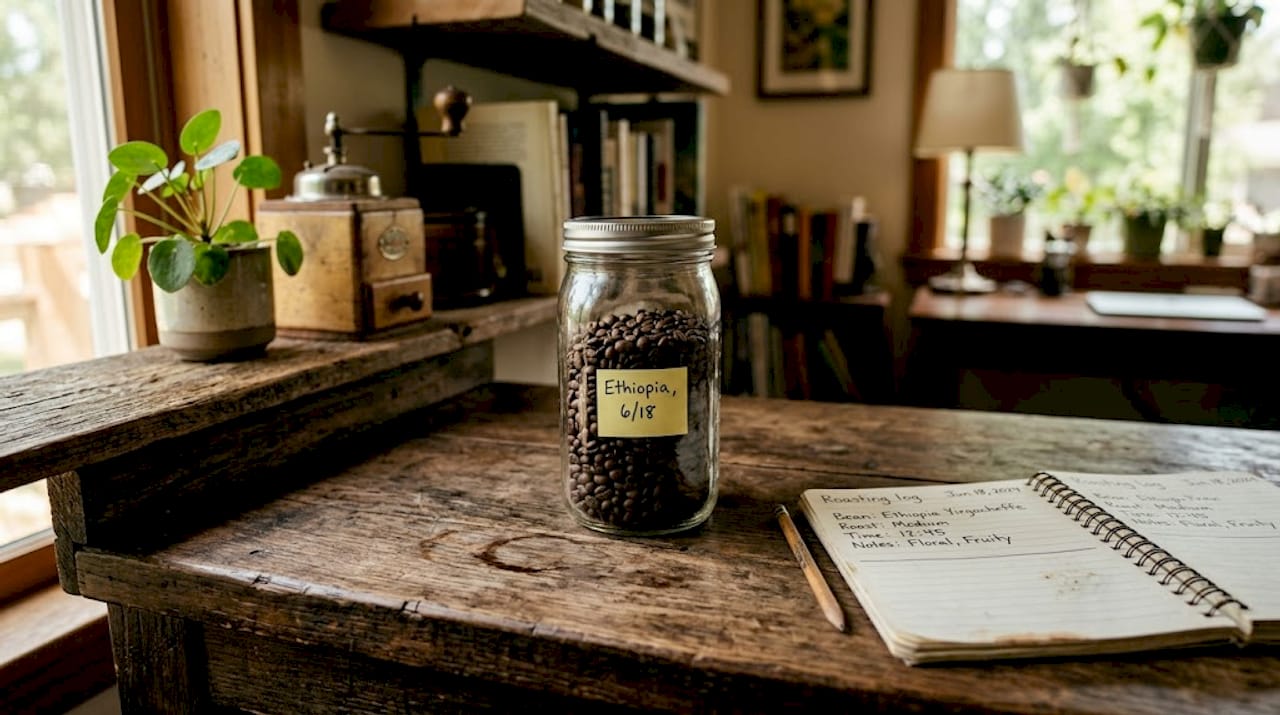
For storage, airtight containers with one-way CO2 valves are the right choice. They let the gas out without letting air in. Keep them in a cool, dark place. Do not refrigerate or freeze freshly roasted beans. The moisture cycling that happens when you take cold containers in and out of the fridge degrades flavor fast. Plan to use your roasted beans within 3 to 4 weeks for the best results.
Here are the mistakes beginners make most often and how to fix them:
- Underdevelopment. Beans pulled too early taste grassy, sour, or papery. Fix it by waiting for a full first crack before evaluating your endpoint.
- Scorching. Dark spots or burnt patches from uneven heat. Fix it with better agitation and lower starting heat.
- Uneven roast. Mixed light and dark beans in the same batch. Usually caused by too large a batch for your device. Reduce batch size by 20% and agitate more consistently.
- Over-roasting. A flat, bitter cup with no origin character. You likely went too far past second crack. Use the sensory cues table and stop earlier next time.
Good ventilation is not just about comfort. Smoke and chaff buildup are active fire hazards, and over-roasting is one of the most common causes of dangerous chaff accumulation during home roasting sessions.
My honest take on learning artisanal roasting
I have seen a lot of people approach home roasting the same way they approach a new recipe: they want a formula that guarantees results. What I have learned is that the formula matters far less than your willingness to pay attention.
The single biggest shift for me was treating first crack as a reference point rather than a finish line. Novice roasters tend to panic at the sound, either pulling the beans too fast or completely missing the window. When you understand that first crack simply signals the beginning of a decision window, not the end of the process, your roast control improves dramatically.
I have also found that beginners almost always underestimate how much the bean origin changes everything. The same technique on a washed Guatemalan versus a natural Ethiopian produces wildly different results. That is not a problem. That is the point. Learning how roasting transforms coffee flavor development for different origins is what makes this craft endlessly interesting.
My honest advice: roast the same bean three times in a row before switching. Take notes every time. The repetition teaches you more than any guide can, including this one.
— Jonathan
Ready to take your roasting further?
Once you have practiced the fundamentals of home roasting, there is something genuinely rewarding about comparing your results to a professionally roasted artisanal coffee. At Variateacoffee, every product is built around one idea: flavor experiences worth seeking out. The Whiskey Barrel Aged Coffee is a strong example. It is roasted and then aged in authentic charred oak barrels to develop deep notes of bourbon and vanilla that no standard grocery blend can replicate. If you want to see what small-batch artisanal roasting looks like at its peak, start there.
Explore the full Variatea Coffee & Tea Collections and find your next favorite cup, roasted to order and shipped fresh.
FAQ
What temperature does first crack happen at during coffee roasting?
First crack occurs around 385 to 401°F and signals the start of caramelization and flavor development. It is the most reliable auditory cue for determining your light roast starting point.
How long does it take to roast coffee beans at home?
Roasting times vary by method, running roughly 6 to 10 minutes in a popcorn popper and 12 to 15 minutes in an oven. Smaller batches always roast faster regardless of the device you use.
How should I store home-roasted coffee beans?
Keep roasted beans in airtight containers with CO2 valves in a cool, dark place and use them within 3 to 4 weeks. Avoid refrigerating or freezing, as moisture exposure degrades flavor quickly.
How soon can I brew coffee after roasting?
Wait at least 12 to 24 hours after roasting before brewing. Freshly roasted beans release CO2 through degassing, and brewing too early produces sour, underdeveloped extraction.
What is the best method for a beginner roasting artisanal coffee beans at home?
A popcorn popper is the most beginner-friendly option because its forced air agitates beans automatically and produces even, clean roasts. It is also inexpensive and gives you quick feedback on roast progress with short roasting cycles.