

How to Make Gourmet Chocolate Coffee at Home
TL;DR:
- Using high-quality chocolate paste and concentrated brewing methods ensures a rich, smooth gourmet chocolate coffee.
- Proper technique, including melting chocolate into hot coffee and carefully frothing milk, prevents common texture and flavor issues.
- Garnishes like chocolate shavings and citrus zest elevate presentation and enhance the overall flavor experience.
You pull your first homemade chocolate coffee off the stove, take a sip, and instead of that silky, rich mocha you imagined, you get something grainy, too sweet, or just flat. It’s a common letdown, and it almost always comes down to a few fixable mistakes in ingredients and technique. The good news: café-quality chocolate coffee is absolutely within reach at home, and it doesn’t require a professional setup. This guide walks you through everything from choosing the right chocolate to dialing in your ratios, so every cup you make delivers the kind of depth and satisfaction you’d expect from a specialty shop.
Table of Contents
- What you need: Ingredients and equipment for gourmet chocolate coffee
- Step-by-step: Crafting the perfect gourmet chocolate coffee
- Taste and tweak: Balancing flavor for premium results
- Elevating your chocolate coffee: Advanced garnishes and serving suggestions
- Why most homemade chocolate coffee misses the mark (and how to fix it)
- Discover premium blends and inspiration for your next cup
- Frequently asked questions
Key Takeaways
| Point | Details |
|---|---|
| Quality ingredients matter | Premium coffee and chocolate paste are essential for authentic, smooth results at home. |
| Technique enhances flavor | Proper integration steps and flavor balancing produce a true gourmet chocolate coffee. |
| Customization is key | Tweak ratios and explore creative garnishes to tailor your drink to your tastes. |
| No machine needed | You can achieve espresso-like strength and artisanal flavor with simple tools like a Moka pot. |
What you need: Ingredients and equipment for gourmet chocolate coffee
Before any brewing starts, your ingredient choices will make or break the final result. Gourmet chocolate coffee isn’t just regular coffee with a drizzle of syrup. It’s a layered drink built on quality components that each pull their weight in flavor and texture.
Here’s what separates a standard setup from a gourmet one:
| Ingredient / Tool | Standard Option | Gourmet Option |
|---|---|---|
| Coffee base | Pre-ground grocery store blend | Freshly ground single-origin or specialty blend |
| Chocolate | Flavored syrup or cocoa powder | High-quality chocolate paste or dark chocolate (70%+) |
| Milk | Regular whole milk | Full-fat oat milk or steamed whole milk |
| Sweetener | White sugar | Raw cane sugar, honey, or none |
| Brewing method | Drip coffee maker | Espresso machine, Moka pot, or French press |
| Frother | None | Handheld or steam wand frother |
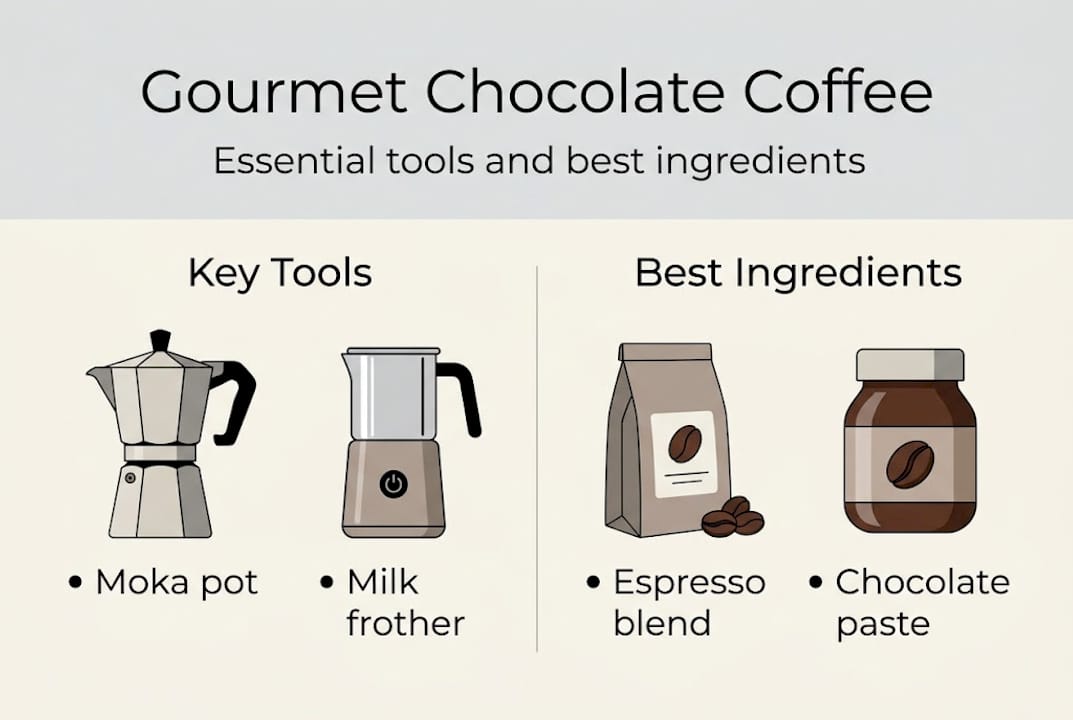
For the chocolate, paste is your best friend. It blends into hot liquid seamlessly and avoids the gritty residue that cocoa powder can leave behind. Look for chocolate paste made from real cacao at a specialty grocery or online retailer.
Key ingredients at a glance:
- Freshly ground dark roast coffee (medium to fine grind)
- Real chocolate paste or finely chopped 70% dark chocolate
- Whole milk, oat milk, or a creamy alternative
- Optional: vanilla extract, cinnamon, or a pinch of sea salt
- Optional: whipped cream and chocolate shavings for garnish
For the brewing device, you don’t need an espresso machine. A Moka pot provides espresso-like strength perfect for a rich mocha base without the high-end equipment cost. French press works too, just brew it strong.
Pro Tip: If you’re looking for a coffee that already carries chocolate and nutty notes built into the roast, our Chocolate Hazelnut blend cuts down on prep and adds built-in complexity before you even add the chocolate paste.
Step-by-step: Crafting the perfect gourmet chocolate coffee
With your ingredients and tools ready, this is where precision pays off. Follow this sequence closely, especially for the chocolate integration step, which is where most home attempts go wrong.
- Brew your coffee base. Use your Moka pot or espresso machine to pull a concentrated 2 oz shot or strong 4 oz brew. For French press, use a 1:10 coffee-to-water ratio and steep for 4 minutes.
- Melt and mix the chocolate. Add 1 to 2 teaspoons of chocolate paste directly into your hot coffee while it’s still around 185°F. Stir continuously for 30 seconds until fully incorporated. If using chopped chocolate, let it rest in the hot liquid for 20 seconds before stirring.
- Taste and adjust. At this stage, the chocolate paste method is universally recommended by experts for avoiding grittiness. Add more paste for richness, or a pinch of salt to round out bitterness.
- Froth your milk. Heat milk to around 150°F and froth until you have a thick, creamy microfoam. Avoid overheating above 165°F, which scorches milk and creates a flat, slightly sour note.
- Combine and layer. Pour the chocolate coffee into your cup first, then slowly pour the frothed milk over the back of a spoon for a clean layer.
- Garnish. Add whipped cream, chocolate shavings, or a light dusting of cinnamon.
“The ratio debate is real. Dessert-style drinkers want more chocolate and less espresso. Purists want the espresso front and center with chocolate as a background note. Neither is wrong. What matters is that you decide before you brew.”
Pro Tip: Experimenting with flavor layering techniques can help you build complexity in your cup without changing the core recipe.
Taste and tweak: Balancing flavor for premium results
After mastering the core recipe, the next step is fine-tuning your drink to personal taste. A great chocolate coffee has three layers worth evaluating: the aroma when you first bring the cup up, the mouthfeel as you sip, and the finish after you swallow.
| Style | Chocolate | Espresso | Texture | Sweetness |
|---|---|---|---|---|
| Chocolate-forward | Heavy (2+ tsp paste) | Subtle (1 oz) | Rich, thick | Higher |
| Espresso-dominant | Light (0.5 tsp paste) | Strong (2 oz) | Lean, bold | Lower |
| Balanced mocha | Moderate (1 tsp) | Equal weight | Silky, smooth | Medium |
As some prefer chocolate-forward for a dessert-like experience while purists emphasize espresso dominance, there’s no single correct answer. Home equipment also affects this balance since you generally can’t match the pressure of a commercial espresso machine.
Common flavor issues and how to fix them:
- Bitter finish: Lower your brew temperature slightly or reduce espresso volume
- Too sweet: Swap syrup for paste and cut sweetener by half
- Watery mouthfeel: Use full-fat milk or reduce water in your brew ratio
- Flat or one-dimensional: Add a drop of vanilla extract or a pinch of sea salt
- Gritty texture: Always use paste over powder, and stir more thoroughly during integration
Understanding coffee flavor pairing can open up new directions when you want to push beyond a classic mocha. For more guidance, these flavor tips for enthusiasts cover practical ways to level up your palate and your cup.
Elevating your chocolate coffee: Advanced garnishes and serving suggestions
Once your flavor is dialed in, the final flourishes make chocolate coffee truly memorable. Presentation isn’t just visual. The right garnish adds aroma, texture, and a new flavor dimension that changes the whole experience.
Top garnishes to try:
- Real dark chocolate shavings (use a microplane over a quality bar)
- Thin orange zest curls for a citrus contrast that brightens the cocoa
- Spiced whipped cream (fold in a pinch of cayenne or cardamom before whipping)
- Micro marshmallows for a playful, textural contrast on dessert-style versions
- A light dusting of smoked paprika for a subtle, surprising warmth
- Crushed toasted hazelnuts for crunch and nutty depth
For glassware, a clear glass mug lets you show off the layering effect of chocolate, coffee, and milk. If you’re serving guests, pre-warm your cups with hot water for 60 seconds before building the drink. Cold glass kills the aroma immediately.
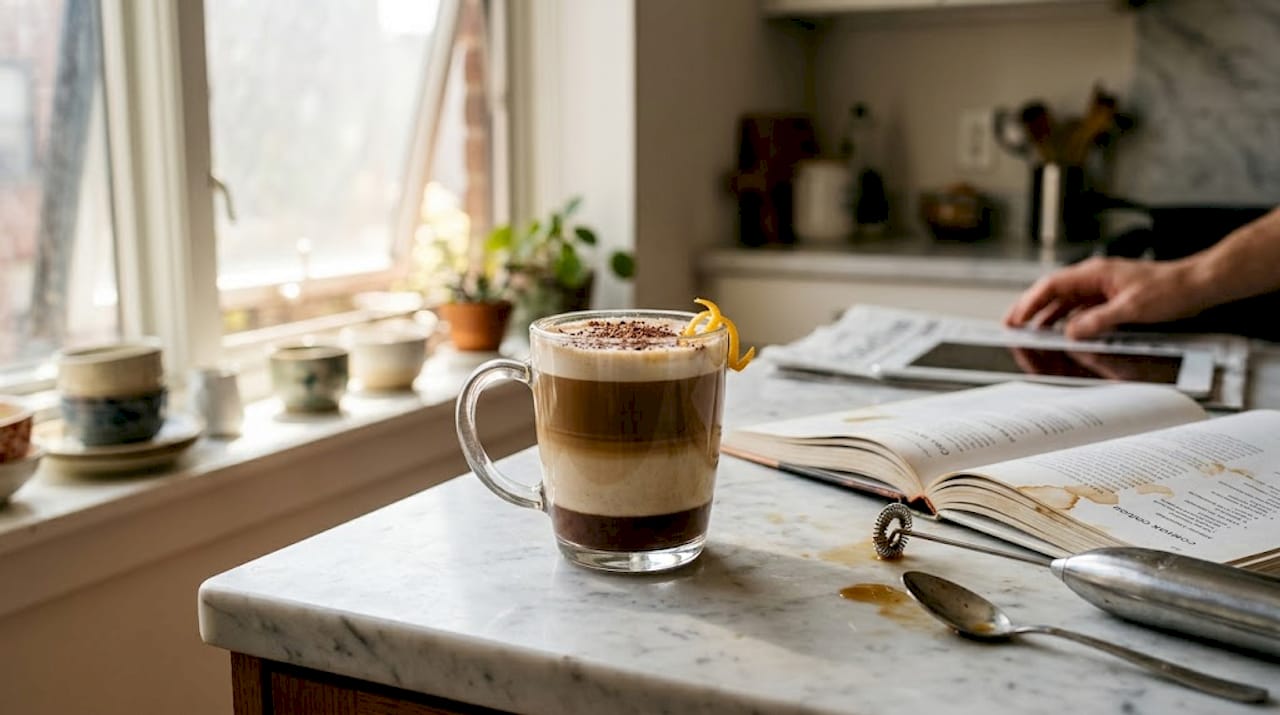
Layering is also worth mastering for special occasions. Pour the chocolate coffee first, add a heavy cream float using the back of a spoon, then finish with garnish. The drink looks as good as it tastes, and guests drink through the layers as they sip.
For more creative serving ideas, specialty home coffee cocktails take this foundation in exciting new directions. And if you want to build a real ritual around your brewing practice, these unique coffee rituals are worth exploring for inspiration.
Why most homemade chocolate coffee misses the mark (and how to fix it)
Here’s the honest truth: most homemade chocolate coffee disappoints not because of the equipment, but because of two consistent shortcuts. The first is using cocoa powder or thin commercial syrup instead of real chocolate paste. Cocoa powder doesn’t fully dissolve, leaving a gritty residue that no amount of stirring can fix. Syrup adds sweetness but skips the mouthfeel and the true cocoa depth that makes a drink feel premium.
The second shortcut is a weak coffee base. Chocolate is assertive. If your coffee doesn’t match that intensity, the chocolate overwhelms it and you end up with a sweet, muddy drink with no backbone.
The fix is straightforward: use a concentrated brew and real chocolate paste, then taste as you go. You’re looking for a moment where neither coffee nor chocolate is shouting over the other. That balance is where the drink lives. Investing in artisanal flavor techniques matters far more than buying an expensive machine.
Pro Tip: Taste your drink at each stage of construction, not just at the end. Small adjustments during the process are always easier than correcting a finished cup.
Discover premium blends and inspiration for your next cup
Now that you’ve got the foundation for truly great chocolate coffee at home, the next move is exploring what premium beans and blends can do for your recipes.

At Variatea Coffee, we’ve built our entire lineup around bold, complex flavor profiles that go far beyond grocery store standards. Our Whiskey Barrel Aged blend adds smoky vanilla depth that pairs brilliantly with dark chocolate. If you’re ready to branch out, our gourmet teas offer a whole new dimension for creative brewing. Every product at Variatea Coffee is designed for the adventurous home brewer who wants something genuinely different in every cup.
Frequently asked questions
What’s the difference between chocolate paste and syrup for coffee?
Chocolate paste delivers a smoother, less grainy texture, which is crucial for gourmet results. Syrup can be sweeter but typically lacks the depth and mouthfeel that real cacao paste provides.
How do I make gourmet chocolate coffee without an espresso machine?
A Moka pot gives espresso-like strength that’s ideal for a rich mocha base. A French press brewed at double strength with chocolate paste mixed in also produces a smooth, satisfying result.
How can I adjust my chocolate coffee to taste more like a café mocha?
Match your espresso-to-chocolate ratio to your preferred café style, using a frother to build that smooth, velvety mouthfeel. As home vs. café differs in equipment, adjusting your chocolate quantity is the fastest way to close that gap.
What garnishes best enhance chocolate coffee?
Real chocolate shavings, orange zest, and spiced whipped cream are the most effective choices, adding layers of aroma, visual appeal, and complementary flavors that make each sip more interesting.